The Auxiliary Transfer Tank for Big Red is Finally Installed
The same model and brand of Auxiliary Transfer Tank was installed in Big Red that I'd put on that good Ol' '98, Better Built.
I came close to putting in a polished aluminum, diamond plate tank. That would have matched the four storage boxes already installed.
In the end, I went with the plain white Auxiliary Transfer Tank for a couple reasons; First, at $205, it was a lot cheaper than the $350+ for that pretty, aluminum unit;
And
secondly, I plan on installing two water tanks, just behind the fuel
tank. Since those tanks are white, and will hide about 90% of the fuel
tank, it didn't make sense to pay for 'pretty' that was only going to
get concealed. As it is, with all three tanks being white, it should
look pretty fine anyway.
Two Things I'm doing different with this auxiliary transfer tank installation is first; a fuel pump, and second; I'll eventually be installing a fuel level gauge.
On the '98, I built it to gravity feed... but I only put in a standard sized fuel line. It took all day to transfer the fuelby gravity. Kind of tough if your moving very fast! If I'd kept that truck I really needed to go back and upsize the fuel line to 1/2" or larger, to speed up the fuel transfer. That and the last 1/3 of the tank was painfully slow to transfer. This time, I'm avoiding that problem by spending a little more precious wages to install a fuel pump.
I spent the better part of a day chasing down all the miscellaneous parts and bits to install this RV Tow VehicleUpgrade. Murphy's law had a couple small but critical pieces out of stock and it took a little huntin' to find 'em.
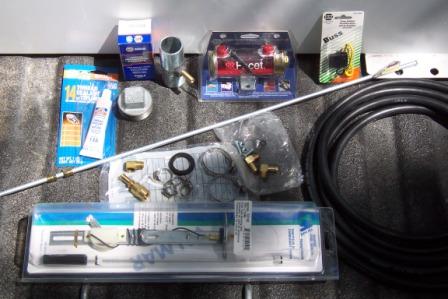

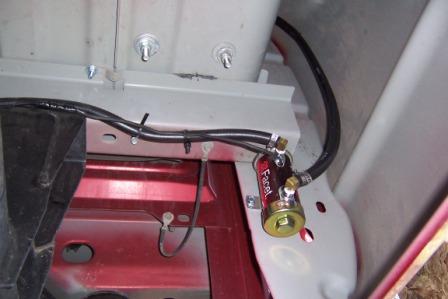
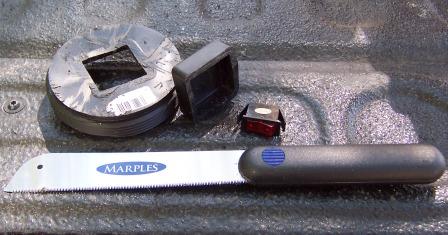
I'm using a fuel pump built by Facet, for NAPA Auto parts. It'll be protected with an inline fuse at 5 amps. I set that fuse holder as close to the battery as possible. The pump is rated at 32 gallons per hour and is also protected with a built in fuel filter. The switch I chose to control the fuel pump is an illuminated model.
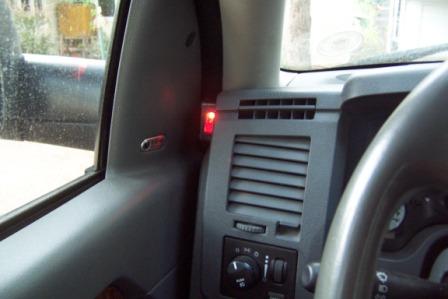
The spot to mount the illuminated fuel pump switch was chosen with the idea that, when the fuel pump is in operation, the bright red light will be a bit of an aggravation. That way I won't experience any unintended 'difficulties'.
A friend's wife once took his truck into town to go shopping at Sam's Club. Along the way she thought she'd help him out and transfer some gas from the auxilliary transfer tank. Only problem was, like mine, the switch wasn't wired into the ignition or oil pressure systems. When she stopped at Sam's .... she forgot to shut off the pump.... :-O
After shopping for an hour or so she got back to the truck, which was now sitting in a puddle of fuel. The fire department wasn't real happy with her!
You better make sure that there is some sort of a warning that you have the pump on! Or wire the pump into the ignition switch so when it is turned off the pump loses power.
On to the Auxiliary Transfer Tank Installation....
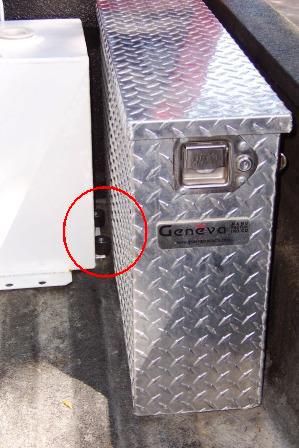
First thing I had to do was remove the two forward tool boxes I recently installed in the bed. The space is just too tight and they had to be out of the way to bolt down the new RV Tow Vehicle Upgrade. A thinkin' fella might have installed the fuel tank first... but then I'd have less to whine about.
Next thing that needed doing was shaving about half of the side mounting tabs so the auxiliary fuel tank would fit into my truck. With the two tool/storage boxes mounted in the forward corners of the bed, the space is a mite tight. A 1/2" or so had to be removed from each tab and then redrilled to bolt the tank down to the bed.
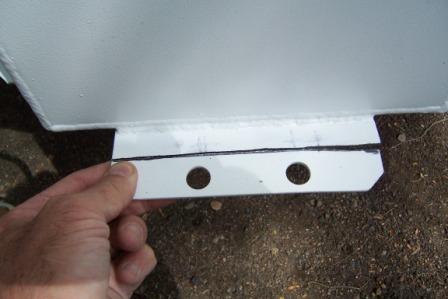
The manufacturer calls for four tie down bolts. I chose to put all four on the side mounts of the Auxiliary transfer tank, and not use the rear tabs at all. I'll be mounting water tanks, tight up against this fuel tank, and need the floor to be as flat as possible.
Ummm..... look real careful, under the bed.... BEFORE... you go to drilling holes. Punching holes in a fuel tank, fuel lines, brake lines, electrical wiring, etc. tends to take the shine off a good day.... and if you put the hole into the center of a cross beam on the bed... you just might have a little trouble getting the nut on it!
To allow me to mount the sending unit for the fuel gauge I needed to punch a hole in the top of the tank. I won't be putting the actual gauge in for a little while but the sensor had to go in now so I can use the tank.
Cutting a hole in a new, unused tank is not a problem... except for all the drill cuttings you create inside. I had to spend a while with a magnet, duct taped to the end of a steel rod, (my awning rod from the fifth wheel) cleaning out all those drill cuttings, after opening the tank up. I don't know any easy ways... at least it was a new tank and I didn't have to deal with fuel fumes.... trying to prevent another demonstration of the big bang theory!
I'd not recommend cutting holes in a tank that's had fuel in it, though it can be done. You have to fill it with water, or pump a huge volume of air through it to prevent any fume build up.
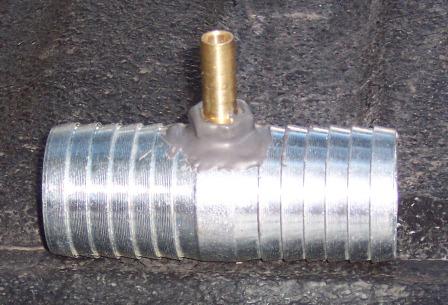
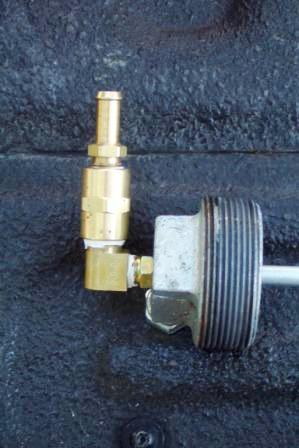
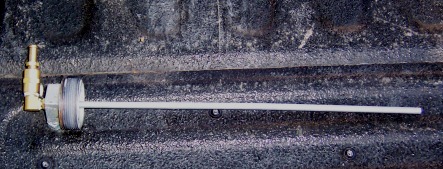
In preparation for the Auxiliary Transfer Tank installation I built both the filler neck adapter and the fuel pickup tube I would need.
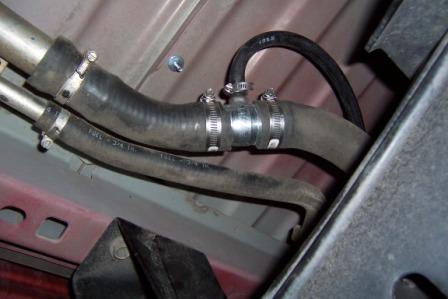
The toughest part of the whole auxiliary transfer tank installation was the work under the truck. I don't contort as easy as I used to, so crawling around in the rocks and the dirt to mount the fuel pump, run the fuel line, run the fuel pump power line, and install the filler neck adapter was a bit of an ordeal.
I was a grubby geezer by the time I got done.... Next morning I was twisted up like a pretzel... Good thing I only had to install one Auxiliary Transfer Tank!
The spot I installed the fuel pump switch is on the left side of the dash. When the pump is activated I figure it'll be right there in my line of sight, where I'm hoping it will be awful difficult to forget. If it's on when I stop, I'm thinking my eyes should sweep that corner as I turn to get out... again.... preventing me from leaving it engaged. And that way, I won't inadvertently overfill the main tank from the Auxiliary Transfer Tank.
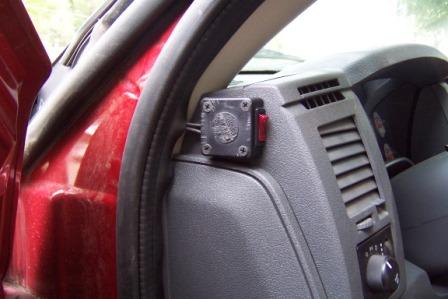
Here's how that little black switch mounting case came to be: I couldn't find any spot on the dash to cut a hole that didn't involve more dis assembly of the truck then I was willing to do... that and those spots were all too low. I needed the switch high and "In the way" so I won't forget I have it on.
I couldn't find any factory made mount so I did the next best thing... strolled around 'Home Despot' for a while looking for that special 'piece' that would work.... I found it in the plumbing Aisle.
Huh? Plumbing Aisle for electrical parts? Uh Huh!
I took a 4" threaded ABS plug and cut the square 'Nut' end of it off!
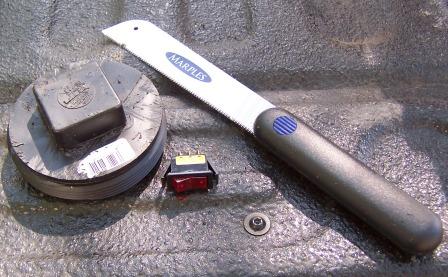
With a notch cut in the front for the switch to snap into and a hole in the back to run the wires through, it was ready to 'silicone' into place on the side of the dash.... GE Silicone II caulk... the miracle 'Do It All'..... Only.... this time itcouldn't pull off the 'miracle' and let go... so I set it in place with four, strategically placed screws!
Only had to put some fuel in the new Auxiliary Transfer tank and giver her a test. It passed with flying colors.
Big Red now has a 70+ gallon capacity with the new Auxiliary Transfer Tank, which gives him in excess of a 1500 mile range running bob tail and somewhere in the vicinity of 770 to 980 with the fiver on.... depending on how heavy my right foot is.
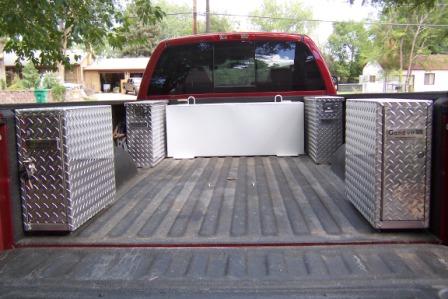
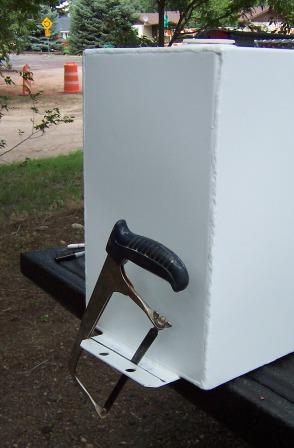
***This is what the Auxiliary Transfer Tank looks like set in place***
**Disclaimer**
This is only a demonstration, for informational purposes only, of what I did for my needs. You are responsible, for the consequences of the decisions you make, to modify your vehicle, to satisfy your auxiliary fuel tank needs.


