


RV Storage Stairs Helps Clear up some of the Clutter
While tearing out the RV carpeting to replace it with Allure vinyl flooring I discovered how poorly built the original stairs were.
The carpet itself was used as part of the structure! With it gone, the remaining stair structure left little to work with. I'd planned on simply removing the treads and install hinged lids to create the storage space... but there'd be no frame or structure left to hinge anything off of.
So... being used to engineering on the fly, I gathered up the materials; Baltic Birch plywood, Brass Hinges, a hasp, and 1" thick, oak treads, to build solid, attractive, RV storage stairs.
They'll be built in the form of two 'boxes'.
The first and largest of the boxes will be used for Dog Food Storage. One of our dogs, Buck, is afflicted with an insatiable hunger :-) ... he's taken to breaking in to any 'unprotected' food storage and eating his fill... so, constantly moving the plastic storage box to a safe location every time we leave the rig, without the dogs, has become an irritating routine... lest he tear off the plastic lid!
The second and smaller of the RV storage stairs is to be used for shoes... much better to my mind than putting dirty shoes in the limited closet space... or cluttering up the bedroom floor.
Of course, as seen in previous pages, doing the remodeling demolition work was the first task. The orginal, carpeted RV stairs had to be uncovered.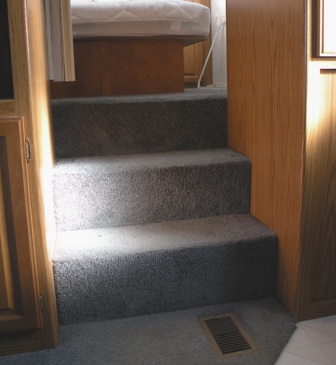
Doing that work uncovered two issues... the first being just how flimsy the origianl RV Factory stairs were...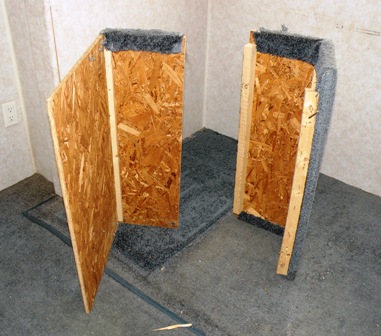
The second and unexpected 'situation' was revealed as the stairs came apart...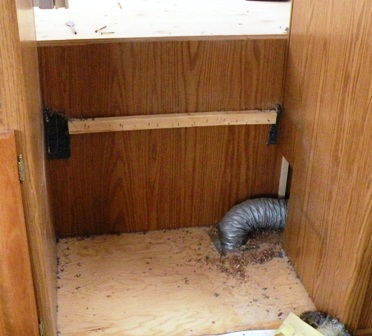
The heater duct running to the bedroom register comes through the floor directly under where I'm planning on installing the RV Storage stairs...
That danged Ol' Murphy fella really gets under my skin on occasion... I can hear that saucy lil' Irishman laughin' now!
Well Ha! Your pathetic lil' pranks have to get a lot more athletic than that ya grubber! I'll just put a 'notch' in that rear box, to fit around the RV Heater Duct work. Ha!
With measurements in hand I went to cuttin' wood... gluing and finish nailing... and came up with this first box of my new RV storage stairs;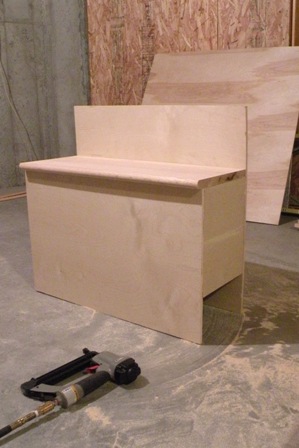
... and, like I said, to fit around that RV heater ductwork, I shaped a notch in the lower corner of that rear, stair box...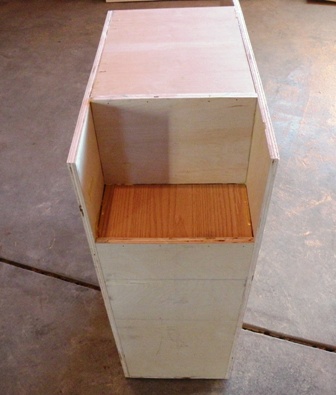
Given the proper tools... and enough time, a woodworker could do fancier joints for the boxes... Since my table saw, router table, jointer etc. etc. went away a couple of years ago... I just did simple butt joints with glue and 18ga finish nails...
... If they come apart... it's because somebody drove a Buick through the door!
Also, while I was working, Heidi walked in and seeing that 'short' side where the notch is... suggested splitting that back stair into two compartments. One for the Dog food... and the second, smaller compartment to hold dog leashes, brushes, tug toys and such...
Standing there looking at how big that partially complete box was... it seemed like a shiny idea... so 'change order' #2! :-)
The result is shown in this view of the installed RV Stairs;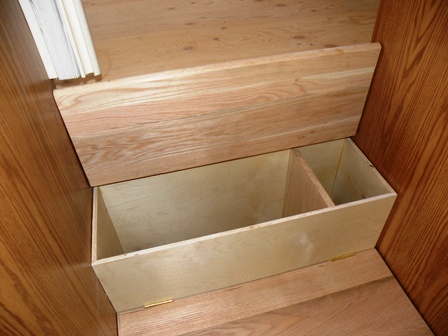
Now... backing up a lil' bit... and goin' back to the Oak Lids/Stair Treads...
I had to decide how to set the hinges. They could either be simply screwed to the tread and to the back of the stair... like on the right side here... or mortised in... as on the left...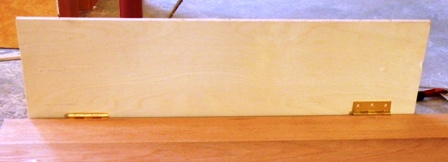
You can also see how I made the back panel of the stair taller, to meet the fifth wheel deck of the bedroom floor. The wall behind these steps is only thin panel, and not enough to set hinge screws into, or carry that weight well... so I opted to cover it with a 'structural' piece of ply...
Well... the mortised in option is obviously the better looking... so I had to cut those Mortises...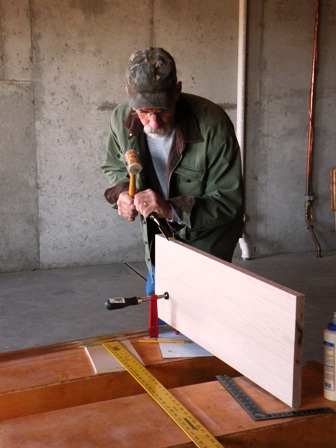
You can do most with the mallet... but some of it is gonna require a mite more delicacy... so you just bump it along with your paw! :-)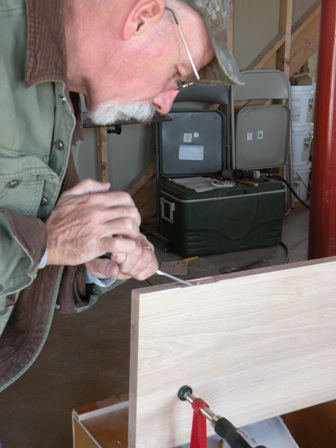
In just a few minutes you've got crisp, clean, mortises for your hinges!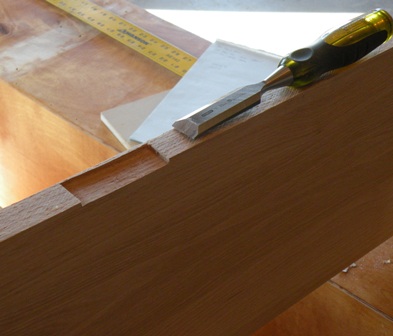
Set a few screws and Wa La! The first of the RV Storage Stairs... completed and ready to install!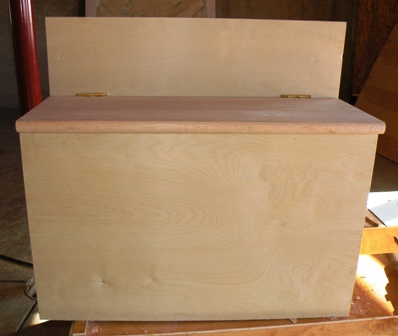
... Only had to carry it out to the rig... a little wiggling... a little cussing... a little convincing, and then a repeat, Wa La! Installed!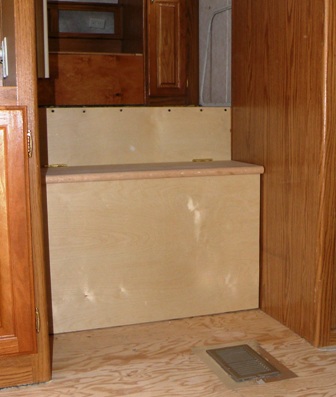
To mount the boxes I just ran a couple dry wall screw through the boxes into the plywood floor... which holds them securely... a lot more than the staples holding the original stairs!
Had to wait a couple more days for the time to build and install the second of the RV Storage Stairs... But, the work got done... and now that wasted space of the original RV stairs is utilized with our brand new RV Storage Stairs.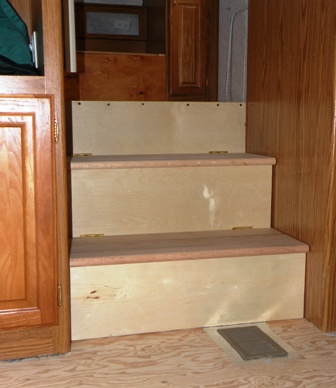
All that remains to be done is to mount the security latch on the dog food compartment... to keep Buck out!... Seal the inside of the Dog Food Compartment... And apply a coat or two of good floor varnish to the whole outfit...
Return from RV Storage Stairs to Goin' RV Boondocking
