The Cowboy Designed
Motorcycle Carrier.....
.... is the motorcycle carrier I needed to carry Slick (my Yamaha V Star Motorcycle) along on our yondering and RV Boondocking circles.
We don't have a toy hauler trailer and didn't want one. It's a fairly safe bet my 500 lb. V Star Yamaha wasn't gonna fit in the bed of the truck. Not with the hitch sitting there in the middle. I don't need to say it wasn't gonna hang out on the front end either! .... Do I?
I've seen racks built to haul ATV's up on the roof of the cab ..... but let's face it, I'm not running my V Star up there! We're already getting awful close to looking like 21st century Okies as it is .... a canoe rack is planned for the roof!
The only place that was left on our rig was the tail end of the Fiver.... Now, plenty of RVers have gone with a receiver hitch and "pull double", putting their Bikes, ATVs, water craft or whatever on a trailer. That can work, if you're set up to handle it, but there are still problems.
First, quite a few states prohibit "pulling double". For me, the ones that outlaw it are either states I want to go to, or are smack in the way of getting to the states I do want to visit. I suppose I could go around, but that don't shine for this guy.
Second, have you ever tried to back a double? Just one more thing to have to worry about .... "I can't pull into anywhere I might have to back up!"
And third, have you ever seen the double and triple semis going down the road in the wind? .... really not my idea of yondering! Wiggling and wobbling all over the road trying to stay in front of their trailiers .... and that witha rig that weighs maybe 80,000 lbs. Mine is more like a 1/4 of that .... and the wind never blows in the west right?
So eventually my hunt for a way to transport my motorcycle got whittled down to figuring out how to hang a motorcycle carrier on the tail of the Jayco.
Right here I need to say, I may be pushing the envelope, a bit, on the cargo capacity of the rig. Here's how I figure it. I tend to move camp with less water in the fresh tank and the black/grey tanks empty. I figure I'm,to some degree, trading those weights.
I'll watch things close and needs be I'll replace with heavier axles if I start cooking bearings or the like. As the Jayco has a double box beam frame both I and the welder just can't see any weakness there.
As for brakes, I have a Jacobs exhaust brake on the rig, and am already planning on changing to one of the electric controlled, hydraulic disc brake systems, hopefully in the next year.
Back to the custom motorcycle carrier I designed and contracted!
I looked around at what's available on the open market. There are plenty of motorcycle carrier versions that plug into a receiver hitch. They seem to work well for smaller bikes, dirt bikes and such. My V Star, is a 650 and while it's not considered a "big" bike, by most bikers, (Big bike being a 1300 or so) it still tips the scale at a mite over 500 lbs. Something like 508 lbs.
Don't know about you but I can't lift it!
The motorcycle carrier I was looking at is rated for 600 lbs. The fact that all that weight is focused on one point (the receiver hitch) just made me a little uneasy. It's not the weight itself, so much as the fact that they tend to "flop" around in the receiver quite a bit. Over time, a 5 or 6 hundred pound scooter, flopping around, on a receiver hitch mounted, motorcycle carrier can't be good!
There is at least one motorcycle carrier manufacturer that has built a system to control the "flop" so you may want to check into that. One I can think of is called the "Joe Hauler" motorcycle carrier.
One other problem with them, (receiver type motorcycle carrier) for me, is that my rig sits pretty tall after having the axles flipped. The problem, that creates, is due to how low slung my V Star is. With the "flat" track in a receiver type motorcycle carrier, that is accessed by a detachable loading ramp, my bike would high center at the "break over" point between the ramp and the track. OK on a dirt bike. Just won't work with my cruiser.
Another option is one of the electric or hydraulic operated motorcycle carrier "lifts". The problem for me with theseis first they are expensive .... more than I paid for my scooter! and second, they're heavy! Since I am already dancing around the weight issue that won't work for me.
If you have a bus conversion, or a solid motorhome with the available weight capacity .... as well as a wallet that weighs more than mine, they're a sweet and convenient system!
In the end, I decided to design my own motorcycle carrier and contract its fabrication with a local welder.
Of course, being me, I managed to deliver the Rig to the welding shop right in the middle of the coldest weather we've had around here in several years, after nearly a month of almost constant snow .... so the fabrication of this highly refined motorcycle carrier did not go off without some minor delay. But that's life in the west!
The welder called just when I was starting to wonder "Was I going to get this motorcycle carrier built this month or not?"
He'd gotten the carrier tacked in place and wanted me to do an inspection before they burned it into permanent position. Figured, if I thought something needed changing it would be easier that way. Sounded good to me so off I went the next morning.
I was a mite apprehensive as I pulled into the lot. Since it was my design, it was on me if it didn't translate into reality very well.
No need for apprehension! I was happy with it from the first look. The welder I had chosen, Distinctive Welding, in Fort Collins, Colorado had been recommended by several people. Most of their work involves architectural type welding. Railings, stairways and the like. Their artistic ability, I thought, would be a real benefit, and I was right.
If welding a motorcycle carrier can be described as an art the guys at Distinctive Welding are in that class. Little touches, like capping the existing frame tube where the old bumper was removed were things that I didn't think of but they did.
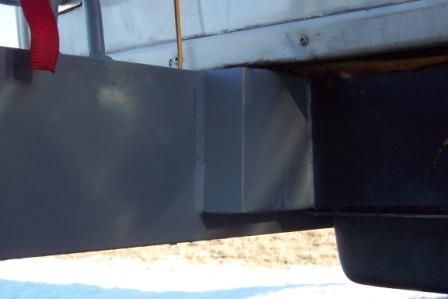
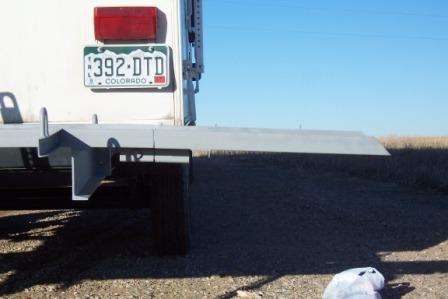
**** The Capped Frame Tube - With the new extension outside ****
The motorcycle carrier they built for me was extremely well done. They took the drawing I provided, along with a couple of suggestions or "ideas" as well as my request that if they saw a way to do something in a "better" or stronger way, to do it! and produced an excellent carrier for me.
With just one, single, possible, problem.
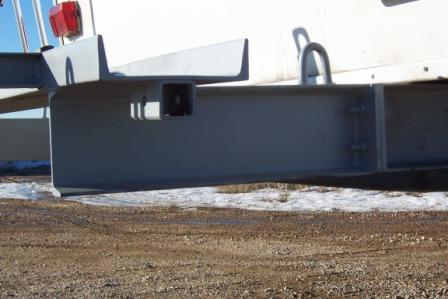
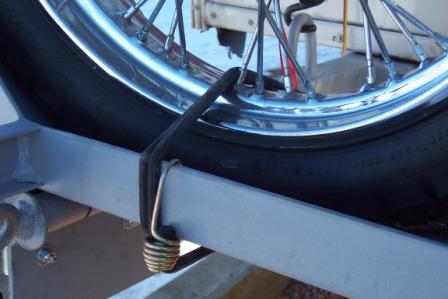
The only thing, at this point, where there may be an "issue" is the way I designed the locking mechanism on the curb side of the motorcycle carrier. There is potential interference between the bike and frame on that side. We have already seen how that can be "fixed" quick and relatively easy, should it prove to indeed be a difficulty. Again, this was my design, and the welders aren't "bikers", so it's on me!
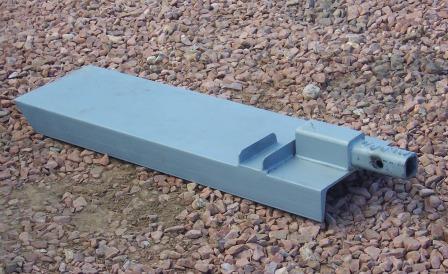
**** Locking Mechanism in the wrong place! ****
Truth is they (the welders) modified the actual latching mechanism with significant improvement. The problem is my design put that mechanism in, what may turn out to be, the wrong place. OOPS! We shall see.
Hopefully, that's a crow I won't have to eat! ..... Do you use Worcestershire or Teriyaki sauce on Crow? Got the rig home a few days later and....
Man I hate the taste of feathers! I was right, I was wrong!! The frame extension on the curb side of the motorcycle carrier proved to be in the way. I couldn't get much more than the front wheel up on the rack. The interference with the brake pedal, the foot peg and the muffler on the right side of the bike was far too much to allow me to just lean it over and go past.
So it was turn around and back to the welder.
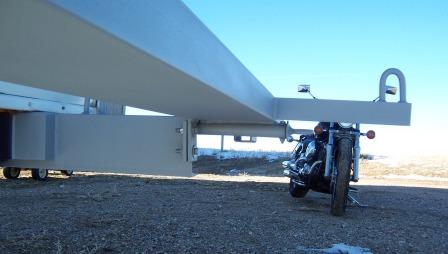
Took him another couple days to fit my project back into the schedule, but they got it done, and done it well! I like the reworked frame extension better than the first. It's really, simple and clean.
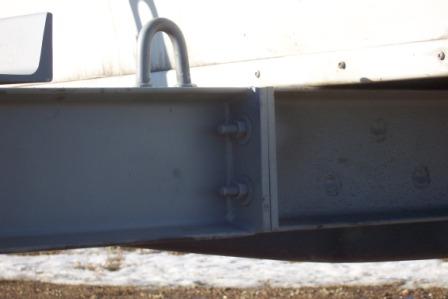
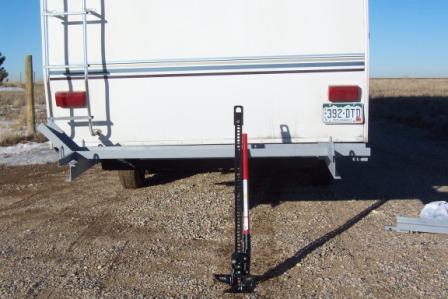
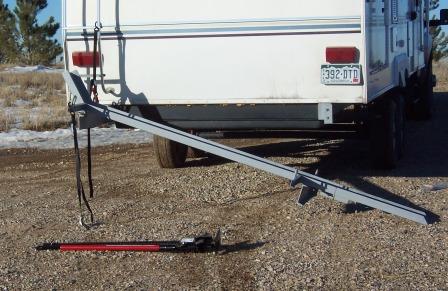
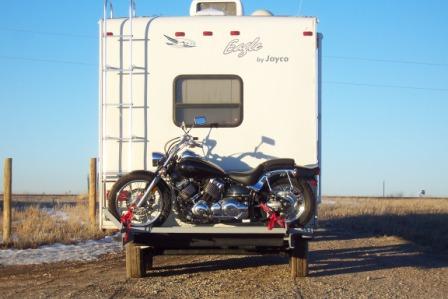
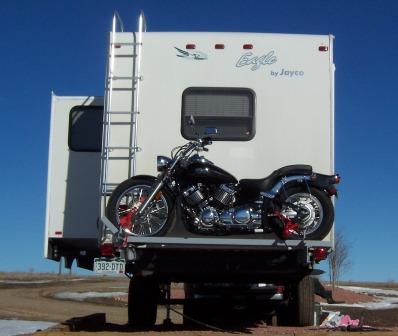
**** Here are a few pics of the full Motorcycle Carrier ****
Now it was time to load Slick ( My Yamaha V Star) for the first time. I
tried a time or two all by my lonesome, only to find out that, my
lonesome, wasn't up to the task! It took the help of my other half to
get the motorcycle pushed up on the track, where I could hold it there
with the front brake, while Heidi hooked the tie down straps in.

Since she will be going with me .... I guess it's OK to need a little help now and again .....
Took a couple tries this first time, to find the technique and strap location that would work. I expect it'll get fairly routine with a few loading/unloading cycles.
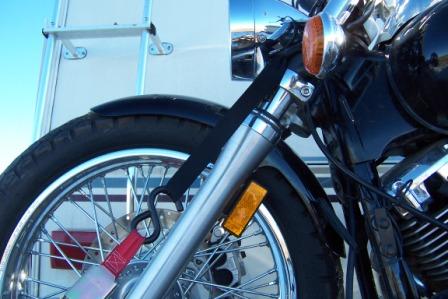
Initially I planned on using the type of strap that goes on the grips over the handlebars. This location proved to not have enough 'angle' to give the stability I needed. My second try, I put some short nylon loops on the forks just below the headlight. This turned out to be low enough, and inboard enough to give a good enough angle to stabilize the bike, side to side.
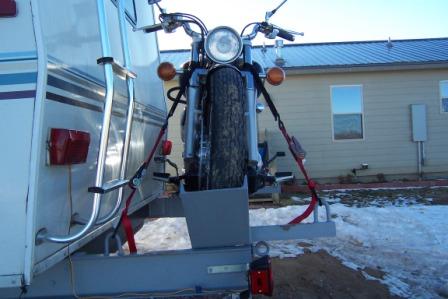
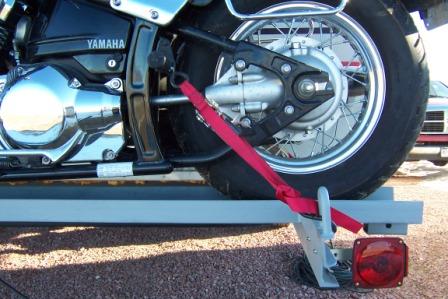
With the same type, winch style tie downs, on the rear end, the motorcycle is solidly cinched in place. I also add rubber bungee straps to tie the wheels to the track.
**** Bungee Cord to make sure the Motorcycle don't move! ****
The actual jacking was not a real big deal. There's a little excess movement in the hinge pin on the road side pivot point which allows the track to move back and forth a ways as you jack it up. All I have to do is hold the jack stable with one hand, while I pump the jack handle with the other. Not a big deal, and takes no great amount of effort.
Also, the guide tabs on the bottom of the track extension, to keep the jack from sliding on the track, are a little to close to the bike. I'll have to get them moved out a few inches to eliminate any interference there. Otherwise it worked just as I calculated it would. Not bad for Cowboy engineering!
A couple fellas at the Yamaha dealer assured me all those tie downs aren't necessary .... but I assured them I'm not going to allow even the slightest chance of looking back in a mirror and seeing sparks and pieces of motorcycle flying around! A few extra minutes spent tying Slick down don't hurt my feelings one little bit.
Seeing Slick scattered all over the highway, because it was inconvenient to solidly secure the motorcycle to the rig, would be really uncomfortable, not to mention embarrassing!
Having the motorcycle loaded that first time revealed yet another unintended consequence .... inventing sometimes takes a couple tries to get it right, I guess. The bike turned out to be a mite bigger (longer) then I realized. The tail lights were completely blocked.
Sure to cause trouble with Deputy Dawg. Don't know about you, but I'd just as soon avoid getting crossways with them fellers unnecessarily!
Back to town for some more parts! Picked out some trailer tail lights and some extra bits to mount 'em and then home for a couple hours of rigging and, DONE!
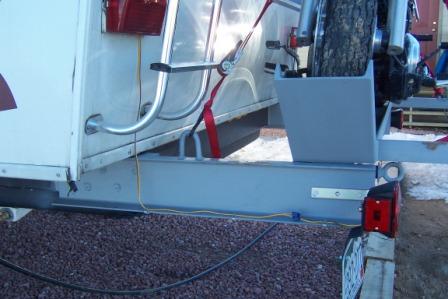
**** Motorcycle Carrier Tail lights added ****
I'm back to legal and safe. Like I said in the blog, another wiring job with no sparks, no smoke, nuthin' but lights that work when and how they're supposed to .... and not hidden by the motorcycle.
Like I said in my daily post, I plan for this to be a fairly temporary wiring job. My intention, when I find a little extra time, is to find a way to fish the wires out the bottom, inside the body and also replace with a shrouded type wire for a cleaner look and better protection. But for now, it is functional and unless I wreck the rig, safe!
Only two little jobs left to do on the motorcycle carrier. One is add some sort of traction to the track. When you undo the straps, the bike slides down the smooth track with the front wheel locked. (Once you pop it out of the tire holding cut out) I'd like just a little more control than that! With some better traction, I might be able to walk the bike up the track, under power, and be able to load it alone .... we'll see.
The second is a final paint job, once I know the "evolutionary" modifications of this motorcycle carrier are complete.
For
now, it looks good, it rides well, and at a cost of $875 it's more
solid and about equal in cost to having a reciever hitch installed plus
the price of a reciever hitch motorcycle carrier. Maybe even a mite
less.
IMPORTANT UPDATE: After having used this setup
for a couple of years... and having the unpleasant experience of that
danged Ol' Handyman Jack collapsin' and lettin' the bike down a lil' too
quick a couple of times, I decided to redesign and rebuild the carrier.
I've also opened up a brand new website dedicated to Motorcycle Touring! You can check out the story of the redesigned Motorcycle lift on my sister site by clicking through on the following link... The Cowboy II Motorcycle Carrier for a Fifth Wheel


