


The RV Battery Bank is the foundation of an RV Boondocking power system.
That is the strength and the weakness of solar power. You can collect it and store it, silently, any time the sun is shining. But an RV battery bank is bulky and heavy. You must be careful to first,
The RV will handle best if the weight of the rv battery bank is distributed as evenly as possible front to back and side to side.
A third consideration when looking for a good location to place the rv batteries is structure. (6) six Trojan T-105 RV batteries weigh approximately 372 lbs. You want to be certain the underlying structure of the RV is sufficient to support the weight of your new rv battery bank bouncing down the highway. Or, alternatively, that the structure can be safely re-enforced with a reasonable amount of work.
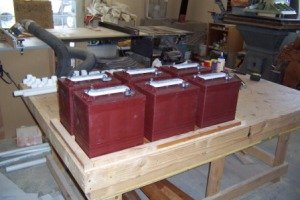
I selected the Trojan, T-105, 6 volt, golf cart batteries for our RV Battery bank because I prefer simplicity and reliability. My research has led me to believe that while the new AGM technologies promise good things, they still seem a little finnicky to me.
The T-105s are the same physical size as the T-125s but have 15 fewer amp hours. The differance is the T-125 batteries have more but lighter plates. I opted for the heavier, more rugged plates in the T-105 golf cart batteries.
I end up with 675 amp hours as opposed to the 720 with the T-125s. With 6 volt batteries, you gain voltage when you pair them in series (6+6=12) but the amperage stays the same. 225 amps + 225 amps remains 225 available amps in 12 volt configuration per pair. 3 pair of 6 volt trojan rv batteries = 675 amper hours available in our new RV Battery bank.
Remember though, it is best to hold your discharge as low as possible and bring the RV Battery Bank to full charge on a daily basis if at all possible. My target is to hold the discharge to around 15% (100amp hours or so) and use my generator to top off if necessary.
The good old wet cells will take more abuse (but can still be ruined if you fail to do proper maintenance) and should be a lot less sensitive to mistakes in charging procedure. Anything that gives me a larger margin for error is a good thing!
Murphys Law won't let me get away with Nothin' !!
If you are the type that really enjoys tinkering with electronics and such, by all means, go with the hi tech AGMs. My guess is you'll have plenty of opportunities to play with all sorts of monitors and such to make sure charging and such is being handled correctly.
See, that's what's so great about all this, you can tailor your rig to fit exactly what you want. Not for me, not the clerk at Camping World, or your mother-in-law! Set it up how you want it!
The layout and Battery compartment construction
My first decision was to move my rv battery bank location from the two battery compartment on the curb side of the fifth wheel, to a new, vented compartment to be built in the front storage compartment under the front overhang. The T-105, wet cell type batteries outgas hydrogen when they charge and so must be provided with adequate ventilation to prohibit "difficulities".
One of the benefits of AGM types is they are totally sealed and do not outgas.
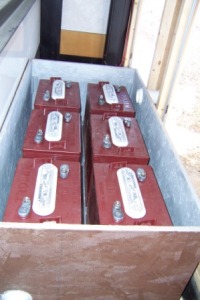
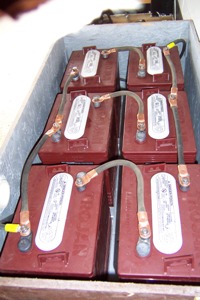
I set the golf cart batteries up in the configuration I wanted, took the measurements and constructed what would be the base of the compartment for our new rv battery bank. I built dividers to keep the rv batteries from sliding around in transit from pieces ripped from standard 2 x 4 dimension lumber.
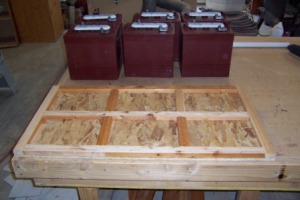
Next was to simply attach the sides.
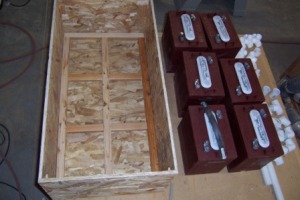
I wanted to seal, protect, and hopefully allow cleanup of any possible spills. I found a material called "Rescue 911" which I think will do that job. It is a spray, plastic, material for sealing leaks. I have tested it and it holds water like a bowl. Time will tell whether it will hold up to the abuse of battey acid or not!
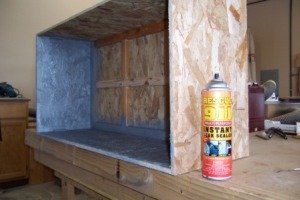
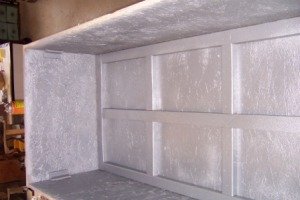
I must say, I am not planning on it having to endure a lot of loose battery acid!
Location and Installation of the RV Battery Bank Compartment in the RV
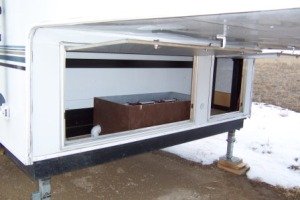
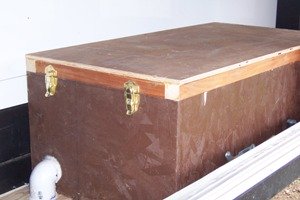
The finished basic box for the rv battery bank slid easily through the open compartment door and was mostly centered in the bay. This provided a good side to side weight balance. Being forward, in the front compartment, a good portion of the weight of the rv battery bank will actually be carried by the truck and not the fifth wheel itself.
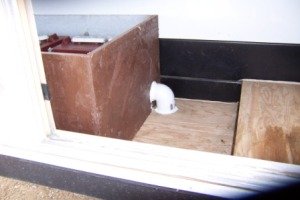
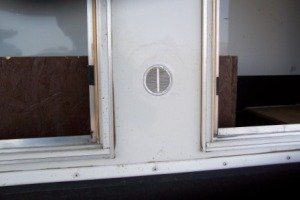
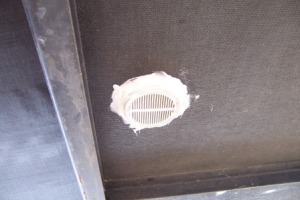
Now for the venting. I found some aluminum mini vents, commonly used for venting attic eaves and such. A perfect size for this rv upgrade! They were also a perfect fit for PVC elbows. These assemblies were siliconed into place in holes cut into the compartment with a hole saw and vented out through the body in the same way.
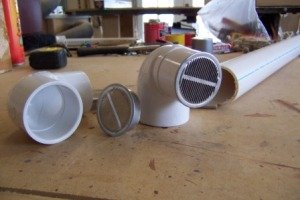
Two vents out through the bottom and one through the forward wall of the storage bay. Convection of the warm batteries should provide sufficient ventilation to prevent any unsafe collection of gasses.
Installation and Cabling of the RV Battery Bank
This part was easy enough. Unless you are a Disabled Vet with a dislocated spine! Whoooooooee. Got any aspirin? 62lbs isn't really that heavy. Until you are leaned over in a fifth wheel compartment holding the battery carrier against your chest trying to clear the rv batteries over the edge of the compartment!
It's a good thing I only put six golf cart batteries in and not eight! I may have had to take two back where I bought them! You may want to have some young, stout relative do this humpin' for you! Leave the torn parts to broken down ol' cowboys too dumb to do anything else!
Next comes wiring up the batteries. I build my own cables using #2 welding cable. Good, heavy, plenty of capacity to carry the amps I am going to pump through them. Just cut to size, strip the ends and crimp the ends in place. These will require monthly maintenance to best maintain the flow of precious solar power.
Cleaning the cable ends frequently will make the work go quickly and help keep your entire system in tip top condition. It need not be an ordeal, just routine, simple, maintenance.
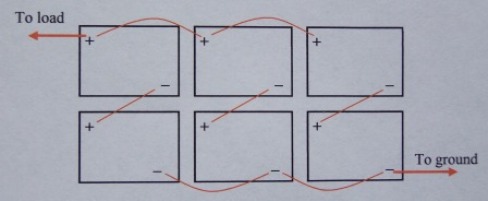
Only two jobs left! Run the supply cables to connect back into the house wiring and install the lid for the rv battery bank compartment. I ran the cables from the rv batteries with #4 welding cable the 15' back to the house wiring which is 10 ga.
Once the full solar system is installed on this rig this will probably be replaced. The inverter will need to be as close to the battery bank as possible. The charging capacity that must now flow from the converter which is back in the "house" will be a lot closer with the inverters charger in close proximity to the rv battery bank. This is one of the reasons I will be having that part done by the Experts!
I possess no desire to watch a high dollar Inverter or system monitor go PPPPPFFFFFFFTTTTTTTTT !!!! in a large, expensive puff of smoke!
For now, this will provide safe 12V to and from the RV loads.
The RV battery bank is in place. The cables are hooked up. No sparks and no smoke! A good thing! and I now have gone from a couple hundred amp hour capacity to 675 amper hours! Sweet!
Keep checking back. As soon as I get the balance of the equipment installed and the article written I will post it here for you!
Return from RV Battery Bank to Goin' RV Boondocking

Fiction

Jeb Taylor Western Series
Volume #1

NEW!
Released July 2012
Volume #2

Short Story/Bio

RV'ing Information

