Let's Do Some RV Remodeling Demolition!
RV Remodeling Demolition for an RV Extreme Home Makeover! :-) The first step in this winters project to custom tailor our Rig to our own way of going.
The Only difference here is that the rig wasn't falling apart decrepit... it just wasn't 'quite' what we've come to want.
We could have spent a huge amount to gain a NEW rig... but the truth is we liked most of our existing rig.
... and I've built improvements in other areas that would be way to much work to replace. Such things as my Motorcycle Carrier, the Solar Power system, flipping the axles... yadda yadda yadda...
Not to mention the miles of good memories carried on this Ol' Jayco.
So... with some changes to the inside of the rig, by way of an RV Renovation... we'll be Golden! Doing this RV Remodel, RV Renovation or RV Makeover... whatever you want to call it, is by far the lowest cost, most Frugal RVing route to take... and the shortest way I know of that takes you to a rig, custom tailored to your idea of what your rig should be.
So now... On to the RV Remodeling Demolition of the existing RV Interior.
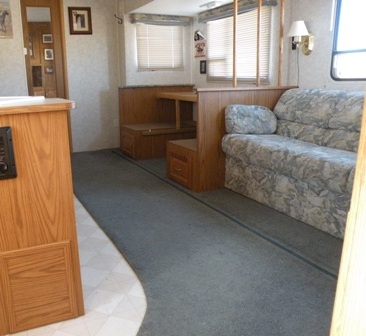
In the following picture I have marked the parts that are to be removed in the RV Remodeling Demolition phase, of this winters RV Remodeling project, with a red hash mark.
First to come out will be the desk I replaced the dinette with a couple of years ago. Under it are the old benches from the factory dinette... Out they come!
Next to be removed will be the original jack-knife couch. and then the low, 'kick-wall, and the spindles above, now separating the couch and desk.
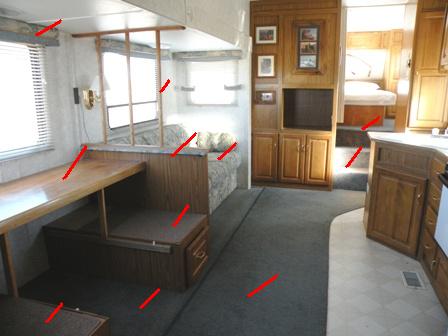
Up in the fifth wheel bedroom area, removed during this RV remodeling demolition will be the RV bed base compartments I also built just a couple of years ago. They'll only come out temporarily. I'll reinstall them as soon as the new flooring has been laid.
Under all that furniture is the carpeting and its' padding... which is going to be replaced with Allure, vinyl flooring.
As I remove the carpeting I'll also tear out the stairs, that lead up into the fifth wheel bedroom, so I can rebuild them as storage compartments.
Other parts to receive some attention in this RV Remodeling Demolition are the RV window valances and the RV light fixtures...
... though those can wait until later... There's plenty to chew on for now...
The two easiest parts to remove, were the Desk and the couch... a few screws... a couple thumps on stuck parts... and zip dee doo da... gone!
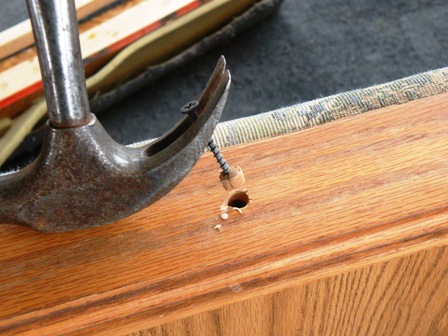
Taking out the spindle section, the screws were concealed by small wood plugs. To keep from destroying the surroundingwoodwork ( you never know when you might want to recycle some part) I simply ran a drywall screw into each plug afew turns... then popped it out with a carpenters hammer.
Then, same with the Bed... a few screws... a pry here and there and out it came... Leaving the carpet exposed for my attack..
Now here is where the RV Remodeling demolition often degenerates to just rippin' and tearin'. There's no easy way I know of. It comes from the way the RVs are put together back in the factory...
Most of 'em do things in almost a modular series of steps... in this case... the flooring goes on... and then cabinets and walls... Bottom line?... a goodly part of the carpet is captured, under cabinets and walls... so it has to be cut and torn loose. Not neat... but it comes out.
and that boys and girls is why they call it RV remodeling demolition... 'cause sometimes you just got to get athletic... and demolish it!
... and reveal a huge amount of dirt! Yuck!
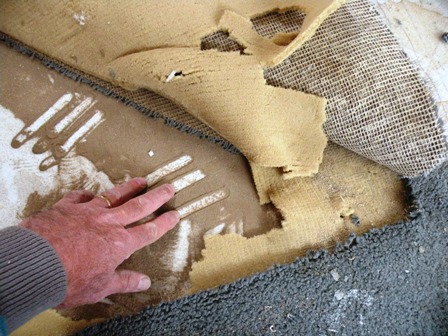
It was almost embarrassing. But here's the thing. We've run an extraction type cleaner over this carpet a couple of times a year since we've had it... We've cleaned the sucker... and it was still filthy... so... You've got a $500,000 Motorhome?
... guess what's under that carpet...
Yup... about a quart of filth for every eight or ten feet of carpet... The only place that didn't have a goodly deposit was the section under the couch and dinette benches. Anywhere our feet have gone... there was a layer of plain Ol' dirt about the consistency of flour laying there under the padding... That junk had sifted all the way down to the floor... Carpet cleaners are unable to get to it...
So... if you have any sort of 'dust' allergies... or respiratory problems... swapping out your RV Carpet for some variety of hard flooring, like we're doing is probably money well spent. Leastways if you like Breathing!
When
I first started working on this RV remodeling demolition, I'd planned
on leaving the carpet intact, in the slide area. Along the inboard side
of the Slide is a nylon piece I call a "Bearing Bar"
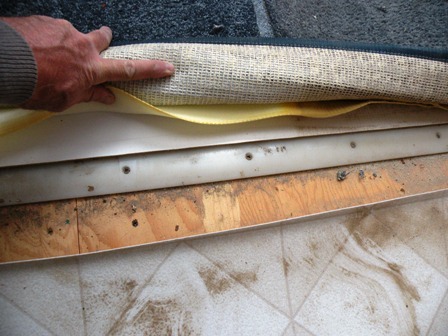
Its purpose is to lift the slide floor and carry it up over the interior flooring.
The problem is, a flap of the carpet in the slide covers it when the slide is extended. Remove that carpet, and with the slide extended there'd be that bar laying there exposed. Not especially attractive.
So... most folks just leave the carpet in the slide and be done with it..
... But... after having the rest of the carpet out for about a week, I just couldn't get comfortable with leaving that last bit of carpet in there. Thinking about the dirt and such, I wanted ALL THE RV CARPET gone...
So... me being who I am... and this being an RV Remodeling Demolition... I just went ahead and ripped it out! :-)
Necessity being the mother of invention, It was my calculation that if the carpet was gone... I'd HAVE to come up with a fix for that less than pretty bearing bar! :-) ... and I do believe I've done just that. I spent some time wandering around both Home Depot and Lowes... and stumbled across something. I don't know why I didn't think of it earlier...
They make pieces called Transition Strips, for those places in homes where you have to transition between carpet and tile or carpet and linoleum or even wood to tile... The things come in a variety of configurations, and I believe I've spotted one that will work for my needs... we'll see once I get to the flooring installation... so check back!
***ed. Note... a reader sent me pics of his remodel of an identical Jayco... in which he did a fine job of dealing with the necessary transition... I'm waiting on some close up pics of what he did... it's a real possible thing, that I'll take his instruction and just be a cowboy copy cat!***
The only place I needed another set of hands was to wiggle that old jack-knife couch out of the rig. Heidi helped with that... otherwise I've been left to my own devices to do the RV remodeling demolition rippin' an' tearin'.
Such things make her nervous... She asks all the time; "Do you know what you're doing?" only to hear my reply; "Hmmm... Not really!" It don't really ease her reservations much. :-)
The way I see it is like this... Nobody ever done nothin'... 'till the first time! :-)
Here's what the fifth wheel looked like 'fore I started in on the demolition phase...
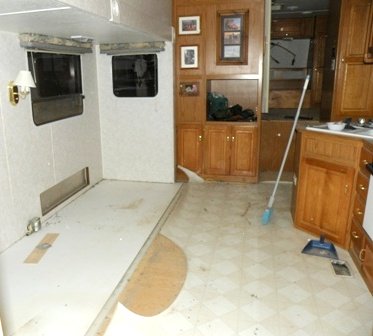
and here it is now after completion of the biggest part of the RV remodeling demolition... with most ever'thing tore out...
And now... The "Rest of the RV Remodeling Demolition story"
As in all RV Remodeling demolition projects... as you work, you're likely to uncover unexpected things that will require some attention.
When I got to the stairs leading up into the bedroom, I'd been figuring on just pulling the stair treads loose, and replacing them with Hinged Treads/lids, easily converting them to storage compartments, once the carpet came off.
Wrong!
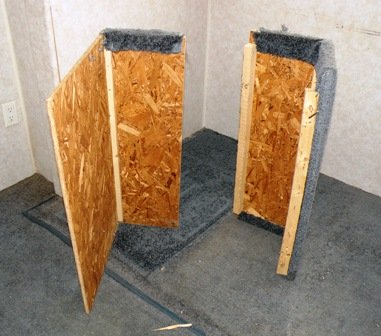
When I tore the carpet loose, the rather flimsy stair assembly pretty much disintegrated... Just chip board and staples flopping around. The RV Carpet itself was a big part of what was holding them together.
What you see in the picture below is pretty much the entire stairway structure. The only thing holding those panels together is the carpet... Nothing to build a storage compartment out of...
... So I'll need to fabricate a complete new storage bin unit, that will also do double duty as the stairs up to the RV bedroom.
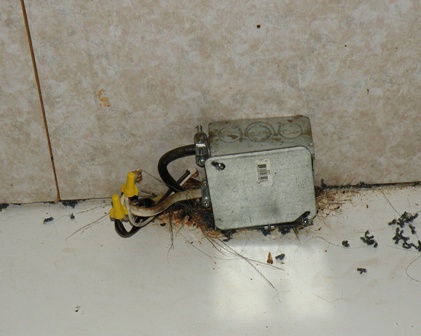
also, an electrical box was exposed that lay under the couch. It's just plain ugly... and ... why did they bother to put in a junction box... and then do 1/2 of the splices... outside the box? really well done! :-) ... I'll redo that lil' bit there to clean it up.
The carpet itself was, as is common, layed over the vinyl flooring. The general rule is, when you lay the new, 'Floating' vinyl flooring, you just drop it over the existing, old, vinyl... Not gonna happen this time.
In the area in front of where the desk/dinette was... you can easily see how the old vinyl had a big, semi circular cut out of it... combined with how it wants to curl along that slide bearing bar... I just don't like the look of it, and know that leaving such a sloppy underlay is gonna irritate me for a long time... so... that old vinyl flooring came out too!
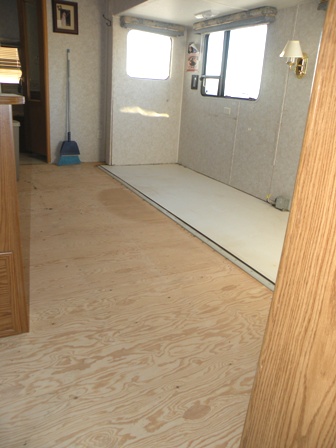
So now, I'll lay the new floor on clean sub floor. Just one more lil' thing...
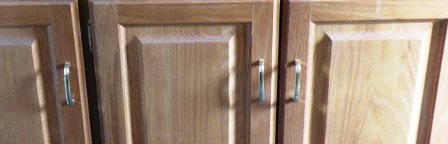
Have you ever noticed how BORING the cabinet handles are, that they put in rigs?... something ought to be done 'bout that!... hmmm
Next up;
With the RV Remodeling Demolition pretty much done I can start in on the fun part... installing all the improvements and upgrades... Like Building the New Storage Stair Unit!
Return from RV Remodeling Demolition to Goin' RV Boondocking


